
Instagram Link in Bio CSS Builder: Mobile Landing Page Code
Contents
Many social networks, Instagram among them, let you put only one external link in your profile bio. If you have several channels you want to send people to, like a blog, YouTube, an open chat, or a Smart Store, you need a separate landing page that gathers those links on a single screen. This article covers how to build that multi-link landing page yourself in HTML/CSS, and how to get the same result without writing any code.
Summary ① Why and how to work around the one-link limit with a multi-link landing page. ② How to size a card layout and write the HTML/CSS by hand. ③ How to pull the code instantly with a tool that gives you the same result from input values only.
Why one link isn't enough
If you use a third-party link-in-bio service like Linktree, you often pay a monthly subscription, and on the free plan your design is limited and the service's own logo shows up with it. A landing page you build yourself in HTML/CSS can be hosted for free on GitHub Pages or your own server, and you can change the design however you like. The catch is that working out the layout sizes and styles and then writing the code takes time.
How to build a link hub page yourself
Sizing the mobile card layout
When you place link cards on a mobile screen (viewport width of roughly 360px to 430px), set the card width and the total page height first.
- Card width = the smaller of the viewport width minus twice the side margin, and 400px (for example, with a 400px viewport and 20px side margins, the card width is min(400 − 40, 400) = 360px)
- Total page height = profile area height + number of links × (card height + gap between cards)
Design elements
- Profile avatar: a 90px circular image (
border-radius: 50%) plus a nickname and a one-line bio. - Glassmorphism card buttons:
backdrop-filter: blur(12px)and a translucent white border give them depth. - Hover and touch response: pressing a button lifts it slightly with
transform: translateY(-2px).
The JavaScript algorithm that generates the HTML/CSS
Here is the source code that takes an array of link titles and URLs and outputs a lightweight, clean batch of HTML/CSS:
function generateLinkTreeHtml(profileData, linkList) {
  let linksHtml = '';
  linkList.forEach(link => {
    linksHtml += '<a href="' + link.url + '" class="link-card" target="_blank" rel="noopener noreferrer">\n' +
      '  <span class="link-icon">' + (link.icon || '🔗') + '</span>\n' +
      '  <span class="link-title">' + link.title + '</span>\n' +
      '</a>\n';
  });

  return '<!DOCTYPE html>\n' +
    '<html lang="ko">\n' +
    '<head>\n' +
    '  <meta charset="UTF-8">\n' +
    '  <meta name="viewport" content="width=device-width, initial-scale=1.0">\n' +
    '  <title>' + profileData.name + ' - LinkTree</title>\n' +
    '  <style>\n' +
    '    body { font-family: -apple-system, sans-serif; background: #0f172a; color: #fff; margin: 0; padding: 40px 20px; display: flex; flex-direction: column; align-items: center; }\n' +
    '    .profile-img { width: 90px; height: 90px; border-radius: 50%; object-fit: cover; border: 3px solid #38bdf8; }\n' +
    '    .profile-name { font-size: 20px; font-weight: 700; margin-top: 12px; }\n' +
    '    .link-container { width: 100%; max-width: 400px; margin-top: 24px; display: flex; flex-direction: column; gap: 14px; }\n' +
    '    .link-card { display: flex; align-items: center; justify-content: center; gap: 10px; padding: 16px; background: rgba(255,255,255,0.08); border: 1px solid rgba(255,255,255,0.15); border-radius: 12px; color: #fff; text-decoration: none; font-weight: 600; backdrop-filter: blur(12px); transition: all 0.2s; }\n' +
    '    .link-card:hover { background: rgba(255,255,255,0.18); transform: translateY(-2px); }\n' +
    '  </style>\n' +
    '</head>\n' +
    '<body>\n' +
    '  <img src="' + profileData.avatar + '" class="profile-img" alt="Profile" />\n' +
    '  <div class="profile-name">' + profileData.name + '</div>\n' +
    '  <div class="link-container">\n' + linksHtml + '  </div>\n' +
    '</body>\n' +
    '</html>';
}
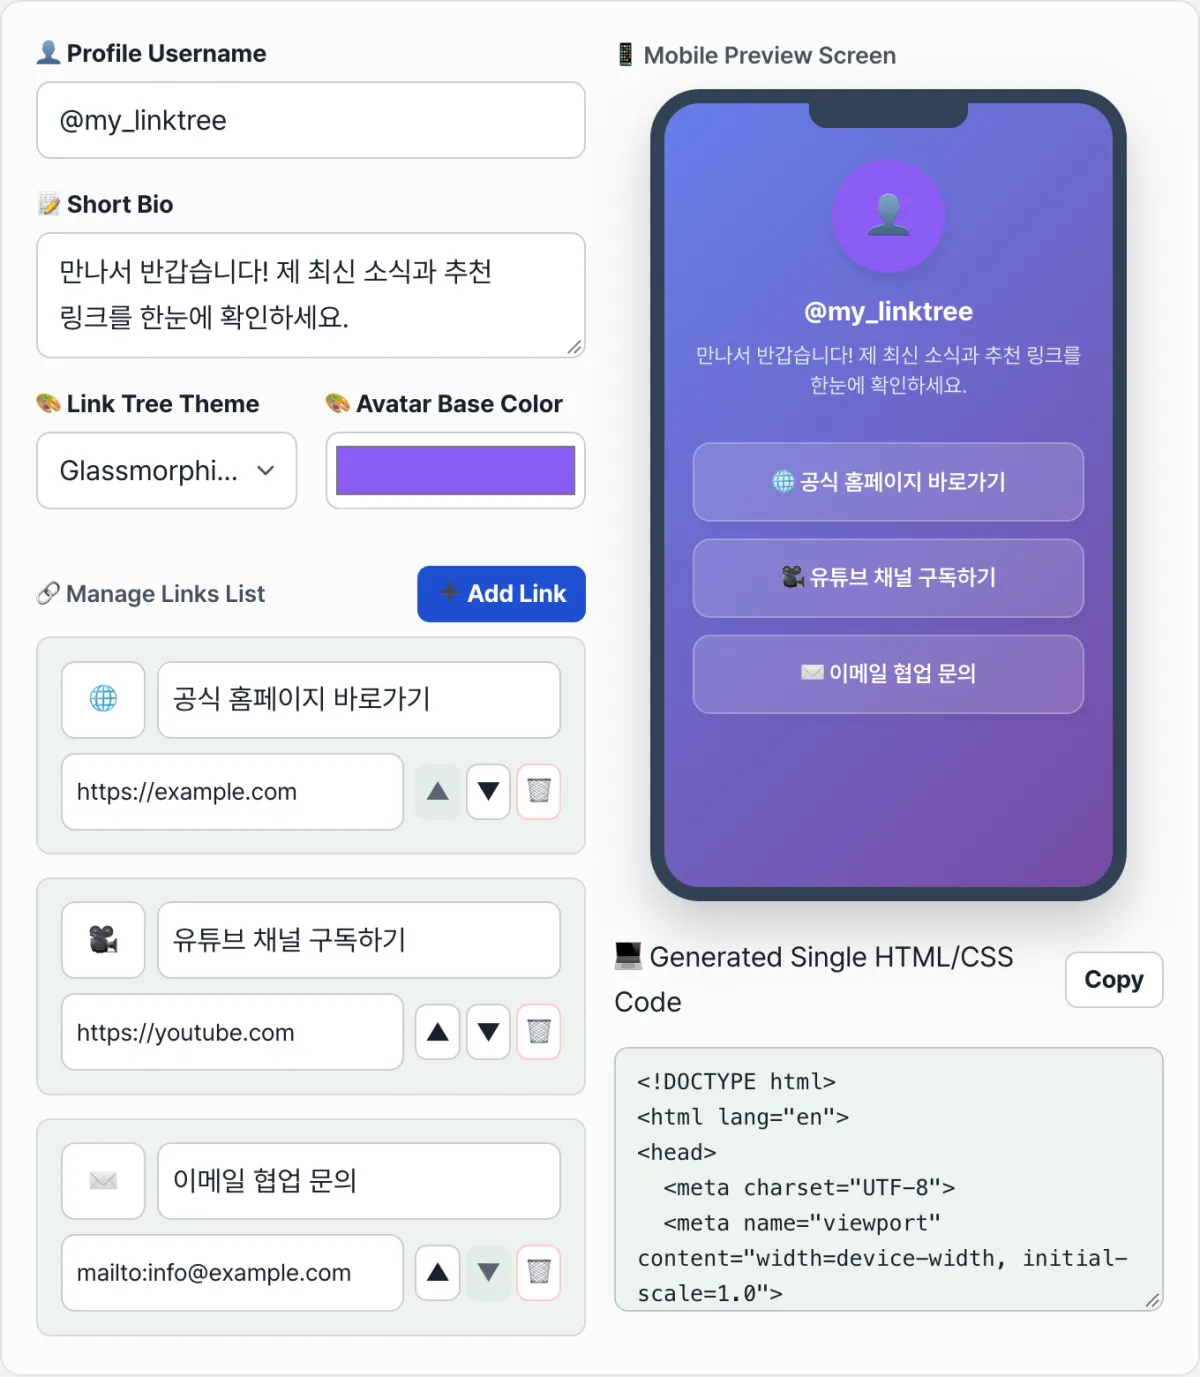
Note You don't have to rely on a paid monthly plan or a third-party link service that slaps its own brand logo on your page. With the Link in Bio Page Builder you can generate the code for a link landing page designed your way and publish it for free. Enter your profile details and your list of links, and the tool handles the layout math and CSS described above for you. Try it with our tool.
Enter your profile details and the list of links you want, then export polished glassmorphism mobile link-tree HTML/CSS code right away.
Key values at a glance
Put your most important destination link (a new product page on your Smart Store, for example) at the top of the cards, and add an emoji icon on the left of the card text that signals the destination, such as YouTube, a blog, or Instagram — visitors can then tell the links apart more easily. Here are the layout and design values covered above in a table.
| Item | Value |
|---|---|
| Max card width | 400px |
| Profile avatar size | 90px, border-radius 50% |
| Card background blur | backdrop-filter: blur(12px) |
| Hover and touch offset | transform: translateY(-2px) |
Wrap-up
The one-link limit on an Instagram or other social profile can be worked around with a multi-link landing page. Card width and page height come from the viewport width, the number of links, and the gap between cards; add glassmorphism styling and a hover animation on top of that and you get a page that looks good on mobile. You can write the code yourself, or save time with a tool that gives you the same result from just your profile details and link list.
Enter your profile details and the list of links you want, then export polished glassmorphism mobile link-tree HTML/CSS code right away.
FAQ
How do I enter my profile details and links?
Fill in the profile image URL, the nickname, and a one-line bio first, then add as many rows as you need with the title and destination URL of each link you want to include.
What design themes can I choose from?
You can pick from style themes such as Glassmorphism, Simple Dark, and Neon, and the theme you select previews right away in a mobile mockup.
How do I use the exported HTML/CSS code?
Attach it to your personal blog (Tistory, Naver, and so on), or upload it as an index.html file to a free static host like GitHub Pages, and you have your own free multi-link tree site.
This article was adapted from our Korean original. Read the Korean original