
Screenshot highlighter colors differ by background — here's why
Contents
When you highlight part of a screenshot or photo with a highlighter, the color that shows up on screen sometimes looks different from the color you picked. On a light background, your chosen color comes through soft and clear. On a dark background, the color almost disappears or turns muddy. This isn't a bug — it's the fixed result of how the highlighter effect is built.
Summary ① A highlighter on screen doesn't paint over the color; it blends with the background color by multiplying. ② So on light backgrounds your chosen color comes through, and on dark backgrounds the color gets pulled toward the dark side and is barely visible. ③ If you want the color to come out the same regardless of background, use an opaque tool like a rectangle or arrow instead of the highlighter.
Why this happens: the highlighter multiplies instead of covering
A real highlighter is translucent ink, so the text underneath shows through. Software mimics that effect on screen the same way: instead of painting your chosen color opaquely, it mixes it with the background color. The blend mode most often used for this is called "multiply."
Multiply blend does exactly what the name says: it multiplies the background color value by the highlighter color value, channel by channel. If you treat color values as ratios between 0 and 1, multiplying a highlighter color onto a white background (1) gives you basically the highlighter color itself. Multiply onto a black background (0), on the other hand, and the result is always 0 — in other words, close to black.
Add translucency on top of that (usually around 50%), and the difference gets even clearer. On a light background, the original background color and the highlighter color mix half and half, producing a pastel tone. On a dark background, the multiply result is already dark, so even mixing in half of it looks almost the same as the original background.
How to check: do the multiply math yourself
You don't have to take this on faith; you can confirm it with numbers. Set the background color and the highlighter color as 0–255 values, and for each channel compute (background ÷ 255) × (highlighter ÷ 255) × 255. That gives you the pure result of the multiply blend.
For example, multiply a red highlighter (239,68,68) onto a white background (255,255,255) and the result is still (239,68,68). Multiply the same color onto a dark navy background (17,24,39) and it drops to (16,6,10) — effectively invisible. The color didn't vanish; it was multiplied to match the background, and you can confirm that by doing the math yourself.
In an image editor, try switching a layer's blend mode from "Normal" to "Multiply" and you can reproduce the same effect. Put the same color layer on a white background and on a black background and compare — the results unique to multiply blend come out the same no matter which program you use.
Check it with our tool. Instead of calculating channel values every time or digging through another program's blend modes, you can just draw on a real screen and compare how the highlighter looks on different backgrounds.
Free · no sign-up · runs in your browser only (nothing sent to a server)
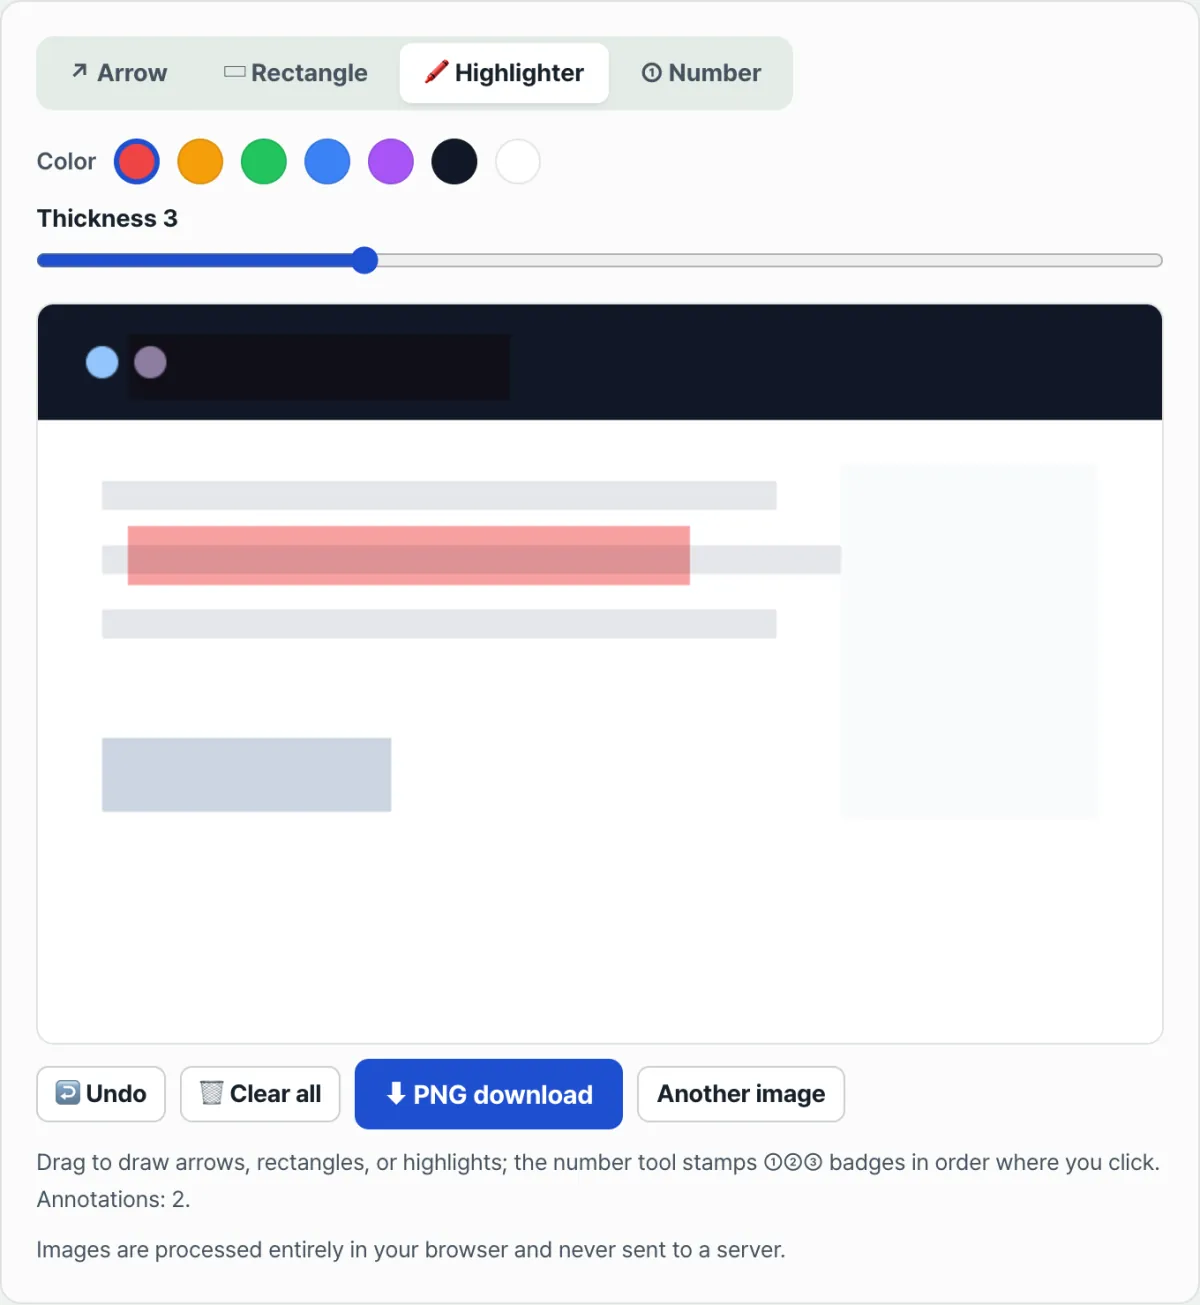
The screen above shows the same red highlighter drawn on a dark top bar and on a light body area. The highlighter on the dark area fades until it's nearly indistinguishable from the original, while only the highlighter on the light area keeps your chosen color clearly in a pastel tone.
Common sticking points
| Symptom | Cause |
|---|---|
| I highlighted a screenshot taken in dark mode and it's barely visible | The darker the background, the closer the multiply result gets to 0 (black), so the color dies |
| I picked white as the highlighter color but it doesn't come out that way | Multiplying by white leaves the background unchanged, so it's effectively transparent — some tools automatically swap in a different color when you pick white |
| Same color, but the color that lands on screen differs slightly from capture to capture | A highlighter isn't an opaque stamp; it's a translucent blend, so it always mixes with the background color |
| Colors marked with the rectangle or arrow tool come out the same regardless of background | Those tools paint your chosen color opaquely, with no multiply, so they aren't affected by the background |
The bottom line
The highlighter color looking different from photo to photo isn't a malfunction — it's multiply blend reflecting the background color. On a light background your chosen color comes through; on a dark background it gets pulled toward the dark side.
If you need to emphasize something on a dark background, like a dark-mode screen, it's better to use an opaque tool that doesn't mix with the background — a rectangle or an arrow — so the color comes through as is.
Free · no sign-up · runs in your browser only (nothing sent to a server)
Frequently asked questions
If I set the highlighter color to be stronger (higher opacity), does that fix the problem?
No matter how high you set the opacity, the multiply math itself doesn't change. Opacity only controls how strongly the multiplied result shows through against the background color — the result still closes in on 0 on a dark background. If you want the color to stay exactly as picked, the only way is to use an opaque fill instead of multiply.
Why don't the rectangle and arrow tools mix with the background?
Because the rectangle, arrow, and number tools paint your chosen color directly onto the canvas with no multiply blend — an opaque approach. They sit on top of the background rather than being calculated into it, so your chosen color shows up exactly as picked whether the background is light or dark.
Does the color stay the same in the saved image file as it looked on screen?
Yes. The canvas you see on screen is saved directly as the image file, with no separate color conversion step. The highlighter color and brightness you saw in the editor stay the same in the saved file.
Does this happen in other image editing programs too?
The exact blend mode and opacity values may differ from program to program, but implementing the highlighter effect as a translucent blend is common across many paint and markup tools. That's why, even with different tools, the tendency for highlighter colors to fade on darker backgrounds shows up in a similar way.
This article was adapted from our Korean original. Read the Korean original