
Shorts & Reels Safe Zone: Where Captions Get Covered
Contents
Uploading the same vertical video to YouTube Shorts, Instagram Reels, and TikTok gives you a different result on screen. That's because each app lays its own layer of like and comment buttons, profile info, and caption text over the video. If the subtitles or key phrases you worked so hard on land right where that layer sits, viewers see them cut off or covered up. This post breaks down which areas each platform covers and where to put your subtitles so they stay safe.
Summary ① YouTube Shorts, Instagram Reels, and TikTok each overlay their own UI in different places, and the area that's actually safe to see is only part of the center of the screen. ② If you plan your subtitle placement in the editor using safe-zone coordinates, you can cut down on clipping. ③ If uploading to the real app to check by eye is a hassle, you can review ahead of time with a safe-zone overlay tool.
Why subtitles get covered in vertical videos
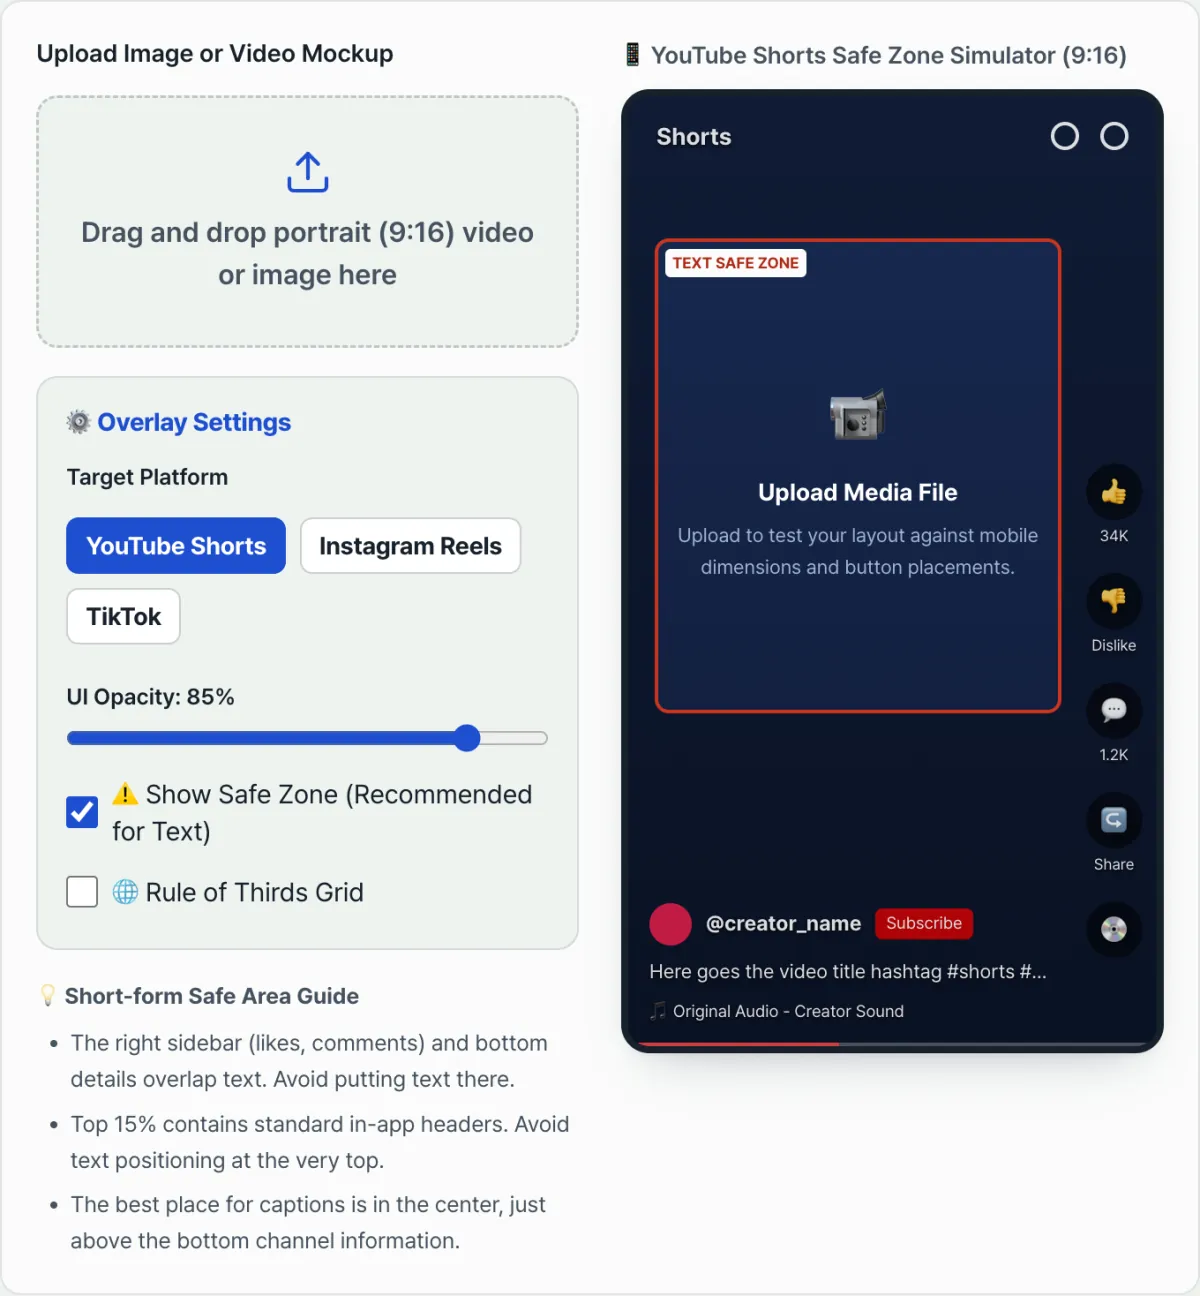
Short-form platforms place reaction buttons, profiles, and caption text as fixed layers on top of a 9:16 vertical screen. YouTube Shorts puts a vertical column of like, dislike, comment, and share icons on the right side of the screen, and separately shows the channel name, subscribe button, title, and audio info in the lower left. Instagram Reels shows like, comment, and share icons on the right and the account name, follow button, and caption text at the bottom, while TikTok places profile, heart, comment, and share icons in a vertical column on the right. If subtitles fall in these areas, part of the text gets covered by reaction icons or account info on the actual viewing screen, making it hard to read.
How to estimate safe zones by hand
In a video editor, you can estimate the safe zone on a 1080×1920px vertical canvas using these proportions.
- Safe zone: inside the rectangle from 54px to 886px horizontally (5% to 82% of total width) and 288px to 1248px vertically (15% to 65% of total height)
- Top blocked area: 0–288px (15% of total height, in-app header such as search and filters)
- Bottom blocked area: 1248–1920px (35% of total height, where channel info and captions appear)
- Right blocked area: 886–1080px (18% of total width, the reaction icon column)
The exact blocked position and size vary a little by platform.
- YouTube Shorts: the right-hand icon column (like, dislike, comment, share, audio) takes up space on the right, and the channel name, subscribe button, and title in the lower left cover the bottom area.
- Instagram Reels: the right-hand icon column (like, comment, share) and the account name, follow button, and caption text at the bottom cover the right and bottom respectively.
- TikTok: the profile, heart, comment, favorites, and share icon column on the right takes up space on the right.
You can also draw this guide grid directly on your canvas in your editing tool. Here's example code that draws a translucent safe-zone guide over a video preview canvas.
function renderShortsSafeZoneGrid(ctx, canvasWidth, canvasHeight, platform = 'shorts') {
  ctx.save();

  // 1. Fill blocked areas with translucent red
  ctx.fillStyle = 'rgba(239, 68, 68, 0.25)';

  // Top blocked area (0–288px, 15% of total height)
  ctx.fillRect(0, 0, canvasWidth, 288);

  // Bottom blocked area (1248–1920px, 35% of total height)
  ctx.fillRect(0, 1248, canvasWidth, 672);

  // Right icon blocked area (886–1080px, 18% of total width)
  ctx.fillRect(886, 288, 194, 960);

  // 2. Draw the safe-zone green border grid lines
  ctx.strokeStyle = '#22c55e';
  ctx.lineWidth = 4;
  ctx.strokeRect(54, 288, 832, 960);

  ctx.restore();
}
Note You can calculate coordinates like this and draw them right in your editor, but rendering the video every time, uploading it privately to YouTube or Instagram, and then checking on a phone screen whether subtitles are covered by buttons is a hassle.
Check it with our tool. Upload a video or image and it overlays the real in-app UI layers from YouTube Shorts, Instagram Reels, and TikTok right on the screen, so you can review your subtitle placement right away.
Upload your video or image, lay the YouTube Shorts, Instagram Reels, and TikTok in-app UI overlays on top, and check for caption coverage risks in real time before you post.
UI blocked areas by platform
| Platform | Where it usually gets covered | What to know |
|---|---|---|
| YouTube Shorts | Right icon column + bottom info | Like, dislike, comment, and share icons on the right; channel name, subscribe button, and title in the lower left |
| Instagram Reels | Right icon column + bottom info | Like, comment, and share icons on the right; account name, follow button, and caption at the bottom |
| TikTok | Right side | Profile, heart, comment, favorites, and share icon column running vertically down the right |
Tips for placing subtitles
Keep your key subtitles in the center, away from the top blocked area and the right icon column, and specifically just above the bottom channel info area, between 20% and 35% from the bottom of the screen. That reduces clipping when you post the same video to all three platforms. Also, if you size your subtitles based only on a desktop monitor, they may look small on an actual phone screen, so it's safer to make them generously large enough to take up a good share of the screen width.
Recap
- YouTube Shorts, Instagram Reels, and TikTok each overlay their own UI in different places.
- On a 1080×1920px vertical canvas, roughly the top 288px (15%), bottom 672px (35%), and right 194px (18%) are areas that platform UI can cover.
- Placing subtitles between 20% and 35% from the bottom, just above the bottom channel info area, reduces the risk of clipping.
- If you'd rather see it with your own eyes by overlaying the real platform UI instead of estimating coordinates in your editor, you can use the tool below.
Upload your video or image, lay the YouTube Shorts, Instagram Reels, and TikTok in-app UI overlays on top, and check for caption coverage risks in real time before you post.
Frequently asked questions
Where's the best place to put subtitles so they don't get covered?
The safest spot is centered horizontally, just above the bottom channel info area (between 20% and 35% from the bottom of the screen), where the right-side buttons don't appear.
Can I check image files, not just videos?
Yes. You can upload not only finished video files but also card news or thumbnail images you've laid out before production and review them the same way.
Can I compare all three platforms at once?
When you choose a platform in the tool (YouTube Shorts, Instagram Reels, or TikTok), that platform's UI overlay is applied. You can switch platforms and check how the same video looks on each one, in order.
This article was adapted from our Korean original. Read the Korean original