
Resize an Image to a Square Without Stretching It
Contents
People often get stuck trying to drop a rectangular photo into a place that requires a square 500×500px image, like a resume photo or profile icon. If you leave "Lock aspect ratio" on in a resizer, the numbers you want won't go in as typed. Turn it off and force the fit, and the photo looks squeezed sideways or stretched top to bottom. Neither result means the tool is broken. Both come from how resizing actually works.
Summary ① Lock aspect ratio keeps the original width-to-height ratio, so if your target ratio differs from the original, that combination of numbers simply can't happen. ② With the lock off and different width and height values entered, the horizontal and vertical scale factors differ, and the photo gets distorted. ③ To hit a different ratio without distortion, you need to crop to the target ratio before you resize.
Why won't it turn into a square the way I want?
Say you have a photo shot at 1600px wide and 1000px tall, and you need it as a 500×500px square icon. With the aspect ratio locked, type 500 into width and the height is calculated automatically to about 313px to match the original 1.6:1 ratio.
Typing 500 into the height field again doesn't help. With the lock on, the width changes back to 800 this time, so the combination 500×500 can never appear. Nothing is miscalculated. This is the "keep the original ratio" feature doing exactly what it's meant to do.
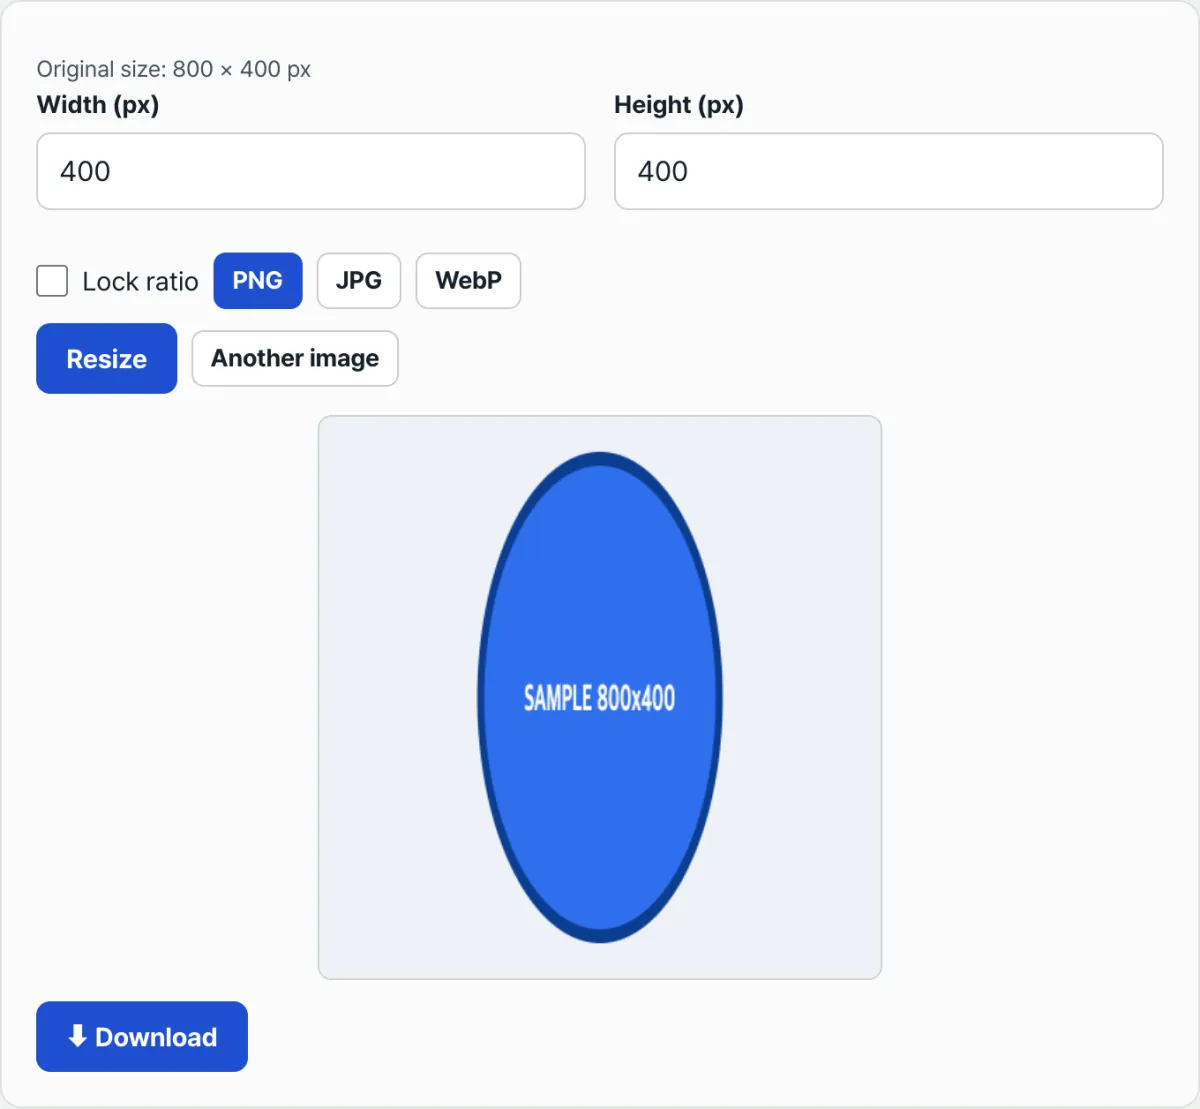
So many people turn the lock off and enter 500 in both width and height. The numbers come out exactly 500×500, but the saved photo is squeezed hard in the horizontal direction. Round shapes become ovals, and square logos become rectangles. It's obvious at a glance.
How to fit it without distortion: crop first
Resizing redraws the entire original onto a new canvas size. If the horizontal scale factor differs from the vertical one, each direction stretches or shrinks by that difference. Shapes stay intact only when the two factors match, meaning the target size has the same width-to-height ratio as the original.
So if you need a different ratio than the original, you have to crop to the target ratio first, before resizing. Once the crop is done, the photo already has the target ratio, so on the resize step you can leave the aspect ratio locked, just scale down, and get the exact numbers without distortion.
The rule for setting the crop area comes from a simple calculation.
- If the original's (width ÷ height) is larger than the target's (width ÷ height), keep the height as is and crop the width down to "height × target ratio."
- If the original's value is smaller, keep the width as is and crop the height down to "width ÷ target ratio."
- Position the remaining area at the center by default, trimming equal amounts from the left and right, or the top and bottom.
For example, to fit a 1600px wide, 1000px tall photo (ratio 1.6) into a square (ratio 1): 1.6 is greater than 1, so keep the 1000px height and crop the width down to 1000px (= 1000 × 1). In other words, cut (1600 − 1000) ÷ 2 = 300px off each side, and you have a 1000×1000 square.
You can handle the math, the cropping and the resizing with built-in computer tools. On macOS, open the photo in Preview, choose "Tools > Crop" and drag a selection to the range you calculated, then go to "Tools > Adjust Size" and enter the target pixel values. On Windows, crop to the same area in Paint, then enter the target pixel values in the Resize image (Ctrl+W) menu, and it's handled the same way.
Check it with our tool. Calculating pixel values every time and bouncing between the Preview and Paint menus to crop and remeasure is a hassle. If your photo is already cropped, you can just leave the aspect ratio locked in the resizer, enter the target numbers, and save it with no distortion.
Free · no sign-up · runs instantly in your browser, no server upload
Where people get stuck
| Situation | Cause | What to do |
|---|---|---|
| You can't enter both the width and height you want with the ratio locked | Lock aspect ratio keeps the original ratio | If the target ratio differs from the original, crop first, before resizing |
| You turned the lock off and forced the fit, and the photo looks squashed | The horizontal and vertical scale factors differ | Crop to the right ratio first, then resize with the lock on |
| The image looks blurry after resizing to a larger size than the original | Upscaling fills in pixels that were never there | Only resize to the same size or smaller than the original |
| The transparent background turned white after saving PNG as JPG | JPG doesn't support a transparency (alpha) channel | Save as PNG or WebP if you need transparency |
Recap
- Lock aspect ratio preserves the original width-to-height ratio, so if your target ratio differs, those exact numbers won't appear.
- Forcing the fit with the lock off scales width and height by different factors, which causes distortion.
- To get the ratio you want without distortion, crop to the target ratio before resizing.
- To set the crop area, compare the original's and target's (width ÷ height) values and trim only the longer side.
- After cropping, resize with the aspect ratio locked to get the exact size with no distortion.
Free · no sign-up · runs instantly in your browser, no server upload
Frequently asked questions
I turned on the aspect ratio lock, but the width and height I want won't go in
Lock aspect ratio recalculates the other value so the original width-to-height ratio stays intact. If the two values you want don't match the original ratio, entering one immediately changes the other to fit that ratio. When your target ratio differs from the original, that combination can't happen with the lock on, so you need to crop to the target ratio before resizing.
Can't I just turn off the lock and match the numbers?
You can match the numbers exactly, but the photo will look squashed or stretched. Scaling width and height by different factors turns round shapes into ovals and square elements into rectangles. The distortion is most visible in photos with clear shapes, like logos and faces.
How do I calculate the crop area?
Compare the original's (width ÷ height) value with the target's (width ÷ height) value. If the original's value is larger, keep the height and crop the width down to "height × target ratio." If the original's value is smaller, keep the width and crop the height down to "width ÷ target ratio." By default, center the remaining area and trim equal amounts from left and right, or top and bottom.
Does this tool have a crop feature?
This tool only provides resizing, which redraws the whole original at the width and height you enter. It has no crop feature for cutting out part of an image. To fit a different ratio without distortion, crop to the target ratio first in another program (such as your operating system's default photo app), then use this tool to scale down to the exact pixel size.
This article was adapted from our Korean original. Read the Korean original